Thursday, December 22, 2011

Happy Holidays

Hello long lost blogging friends. Bet you though I fell off the earth, I did not. I just fell into the Hunger Games Series and also fell into watching season 1 of Grey's Anatomy. My apologies. Here is a picture of our Christmas tree. 


We/I got super excited and cut down a tree right after Thanksgiving. I was too anxious about putting all of the handmade ornaments on the tree to wait one second longer. Now that I have a nearly dead tree and more needles on the floor than on the tree I realize I should have waited. Oops. Live and learn I suppose. 

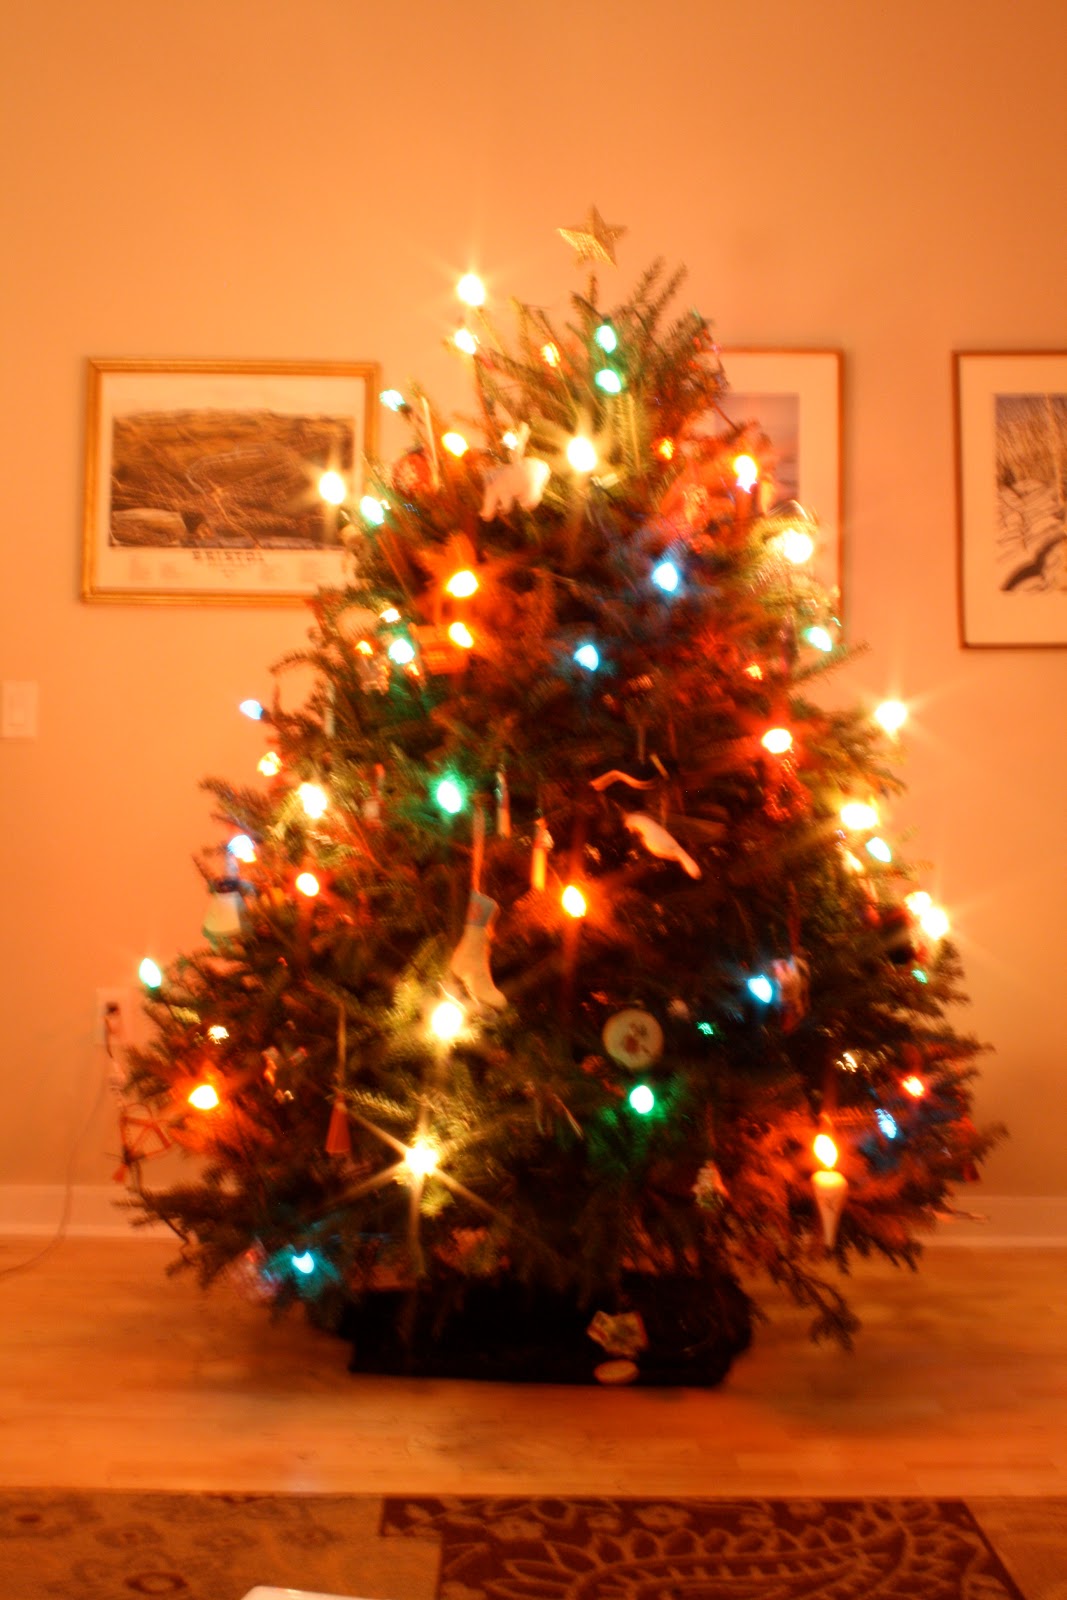
It sure is pretty though. I tested out some settings on the camera to get the lights to look cool; this is the best one I got. On another Christmas related note; here is a picture of Charlie and me that I think is positively hilarious. It was taken at our friend's holiday party. I convinced Charlie that we should dress up and he convinced me that we should wear blazers, then of course I had to add a holiday pin, and a cheesy pose. Would you vote for us if we ran for Senate?


Happy Holidays!

Lauren


Wednesday, November 23, 2011

Man Camp

My Dad and brother always make fun of Charlie for not knowing how to do "manly things." This past weekend, to remedy the situation they had "Man Camp." First my dad and Charlie fixed the sink in the kitchen; I read the comics. Next up was logging 101. There were a few dead/ nearly dead trees in the yard that needed to come down. Charlie got to use a chain saw to cut up some of the trees. I ran around the woods taking pictures of my ornaments. Then Charlie cut down a tree with an axe. Doesn't he look proud? 


Not to be outdone,  I cut down a (smaller) tree with an axe. It was pretty exhilarating. My arms are still sore. I am just glad I have all of my fingers and toes.


Man Camp concluded with venison Shepard's pie, and watching football on the couch. I ate the potatoes and corn and took a nap. 

Lastly, I was playing around the with camera and Garrett joked that I should take a few pictures of "a real man" so I snapped this one. It cracks me up, the Cassidy Adam's apple proudly on display beneath the worlds scruffiest beard. 

The next man camp will be all about splitting wood. I think I'll bring some knitting.

Lauren! 


Monday, November 21, 2011

Ornaments


I love homemade ornaments. A few years ago I started asking my mum for kits to make felt ornaments from one of my favorite blogs Posie Gets Cozy. The kits come with pattern pieces, the perfect amount of felt, embroidery floss, sequins, buttons and any other necessities to complete the project. Last year I made two ornaments over one lazy weekend, the year before I made two over my extended graduate school vacation, and this year I decided to get an early start and finish up the most recent kit before we got our tree. Each ornament takes quite a while to make but the details are really what make each one so special. 


This coat reminds me of one I had when I was little, which was not this sophisticated, but it was cute and I did have mittens with strings tied to the coat so I would not lose them. 


I experimented a lot with different pictures of each ornament and this was my favorite of the polar bear. Since the bear is only two pieces of felt it came together much faster than some of the other ornaments which take lots of different colors of felt and cutting etc. The polar bear did come with yarn to make the worlds tiniest scarf though, more on that later, once my fingers stop bleeding.


Last but not least, a lovely mug of hot chocolate. I'd love to spend a few winter nights snuggled up watching a movie sipping hot cocoa from a mug that cute.

There is one more ornament from the kit that I have to finish, the hardest of them all, so hopefully I can finish that up before we get a tree. Oh, and it is snowing out so my polar bear has been complaining non-stop about not having a scarf. Hopefully he'll pipe down once I get it all done.

Happy Wednesday!

Lauren

Monday, November 7, 2011

Hi Dad!


My Dad said I don't post enough so here are some pictures from this weekend. It would appear by looking at recent posts that all Charlie and I do on the weekends is search for waterfalls while I take a bazillion photos. That is correct. Oh, and nap. Wait, that's just me. This weekends adventures were Rainbow Falls, and Livermore Falls. Livermore Falls had more to look at and explore. At the falls there is an old run-down mill, a huge suspension bridge of some sort and a massive tipped over tree. The rocks by the falls were also really cool and had spirals and other formations cut out of them. Lots of the holes had frozen water in them, so I now have about 50 pictures of leaves frozen in water. Hope this keeps my reader(s) entertained. I have lots of sewing that I've been doing but alas it is all for Christmas. I will show some completed projects soon though. Promise.


Lauren

Sunday, October 23, 2011

Welton Falls Hike


Charlie and I went hiking today. It was lots of fun, except when we had to take off our shoes roll up our pants and cross a freeeezing river. The waterfall we hiked to looks kind of small in the pictures but Charlie is hiding in the last picture, can you find him? The second picture is a close up of where he is standing in the forth picture. The area was very cool and had been carved out by rocks and glacier(s). I can't wait to go back in the summer when we can swim here. Don't worry though, even I am not stupid enough to think about jumping.

Sometimes I think I want to move to be closer to friends and family, but other times when we go exploring I think I want to stay here because there are so many cool places we've yet to see and experience.

Lauren

Wednesday, October 5, 2011

Fall Faux Suede Purse

After I finished the  Irene Purse I realized it was a bit spring-ish for the upcoming fall months so I set out to make a fall/winter purse. I started by "pinning" a bunch of pictures of purses I liked. See my inspirations here.  It seems that cross body purses are big this season, as well as leather...or maybe I just liked those looks and searched a lot of them. I really fell in love with this yellow purse from Urban Outfitters and even thought about buying it but then it was out of stock so I had to make my own version (now it is back in stock...figures.)


Let's just say that finding yellow faux leather material in Northern New Hampshire is not exactly a possibility but I did find some faux suede fabric in the bargain bin for $2 a yard! Sold. I still really had yellow on the brain though so I found some yellow cotton for the inside.


 I also looked for a pattern while I was at the fabric store but couldn't find one. The other day it rained all day long so I made up two prototypes for this purse and when I was satisfied I started sewing with the real fabric.


The best part about the purse is all of the details, at least I think so. It has a front pocket perfect for carrying a checkbook and pen, a pocket inside that fits my cell phone perfectly and an inside pocket that is the perfect size for my wallet and keys.


It even has a back zippered pocket to hold my flash drive and chap stick. I like that everything has it's own space and I never feel like I am searching for anything. I also like that the flap opens up and you can see everything inside, no dark abyss that hold all of my junk and is very hard to locate anything. I guess that's the benefit of thinking about the elements of a purse you want for 4 weeks and making your own pattern. 

The last element that I love is that the strap is adjustable so it can go from an under the arm purse to a cross body purse in a mater of seconds.


Here is my best try at a mirror self portrait. I still haven't mastered the don't scrunch your face up when looking trough the camera face.


The best part is the entire purse only cost $16, much better than a $39 purse from Urban Outfitters or $300 from Kate Spade.


Do you have any fall projects you've been working on?

Lauren


edit: I just added this to Friday Sew N' Tell.

Thursday, September 22, 2011

Daisychain Sampler


 I knew back in May when I saw it that I absolutely had to have this embroidery kit, so I bought it. It came shortly before our wedding and I opened the package, admired it, then set it aside. After the wedding I got to work. I like to do projects like this one when there are people around and I can work while talking. I also don't mind working on embroidery while watching a TV show or a movie. This embroidery was a saving grace while we were on Cape Cod during a pretty bad spell of weather over the summer. I also like that it isn't hard to get back into. I can pick it up after not working on it for 2 weeks and fall right back into the rhythm. I've never worked with crewel wool before, it takes a bit of getting used to. I like that it is fuller than embroidery floss, and feels nicer, it is a pain to thread through a needle and also can stretch out if you pull it too hard.
I am making slow but steady progress and wanted to share something since I've been pretty absent lately. I am a bit uptight and can't go out of order, only 6 letters left to go.

Are you working on anything special?

Lauren

Friday, September 2, 2011

Ch-ch-ch-changes

Welp, I thought that if I updated my blog I would post more. Let's hope so.

Since the only new pictures I have of anything recently crafty that I've done are from the wedding I just decided to make a whole new header of wedding photos. For some reason I was a bit busy on the wedding day which means all of these photos are from my friend Jaclyn. Thanks Jac!

In other changes news, the first week of school went well. As predicted I dragged my feet and complained non-stop for a week about the start of school and then once I got there it wasn't so bad. I am having trouble getting used to being called Mrs. Therriault though.

Charlie has started student teaching and another huge change has been that we now get up at the same time in the morning and must share a bathroom.

I've joined Pintrest. It's pretty snazzy and easy to use. No more copied pictures hanging out on my desktop to confuse me. If I had joined this site before our wedding I would have either been way more organized, or way more stressed out because I would have had 10,000 ideas instead of 7,000 ideas.

We are going to New Jersey this weekend for another wedding. This will be the 5th one this summer. One might think that I would be sick of weddings but I am not, especially now that I know how much effort goes into planning one. Can't wait for Jay and Meera's big day! Then I will have another sister-in-law.

I think the biggest change around here will come in October when we don't have plans every weekend and can do some more projects around out apartment.


Off to New Jersey!

Lauren

The Irene Purse

Last week I noticed that my Bonsai Bag was looking a bit sad and dirty and just plain faded. (I suppose using it for a year straight will do that.) I figured I wouldn't have time to sew a new one though with school starting back up again and two more weddings to go to. Then! Hurricane Irene came along. Luckily our power did not go out, nor our roof blow off, and the first day of school was canceled due to the storm. So, stuck at home with no where to go, I started looking for tutorials and patterns for another purse. Low and behold I found a pattern in my drawer that I borrowed from a friend. Simplicity Pattern 2396 and sewed a new purse in the time it took Hurricane Irene to dump 9 inches of rain on us. I thought I should name the purse after her. Here it is, the Irene Purse:


The corduroy was left over from the Bonsai Bag, inside is lined with a plain blue sheet that was left over from the Peacock Quilt, and the polka dots are from Denyse Schmidt's line of fabric at Joann's; which I bought with no plan in mind just because "I had to have it!"


Don't blow away purse! I used the pattern for the pieces and then pretty much disregarded the rest of it and added details that I like to make it more personalized.


Here is the inside. The pattern says to just put a pocket but I made a zippered one to hold my phone and flash drive, which would go missing for days, or be scratched irrevocably if left to fend for themselves with the other inhabitants of my purse.  On another note the pattern says to make the inside just like the outside of the purse, meaning you would have to cut 4 pieces of fabric for the lining and also pin and gather it. I ignored this and just traced the outside section once it was sewn together onto the lining fabric and cut it that way. Much easier in my opinion. 


The pattern also said to add a magnetic snap to close the purse but I didn't have any at home and I couldn't very well drive 30 minutes to Joann's in the middle of a hurricane so I added this flop over thing. I think it looks cute and keeps the bag closed. 


Piping is the best.


The pattern also said to sew the straps into the purse but I added these metal loops because I think it makes it look fancier. I just wish I had made the purse straps a bit thicker, they aren't very sturdy with only one layer of interfacing.

I had this whole snazzy idea for a photo shoot but Charlie got annoyed when I kept asking him to take more pictures, he just wanted to identify trees in the yard, figures. This is the best one.


Not exactly what I was going for. But you get the idea. 

I'm going to enter it in the Purse Week Contest.

Lauren!


Thursday, August 18, 2011

A Quilt for Kiki and Pat

I bet you thought I would never show you another sewing project ever again huh? Well, I was working on a big one all summer but had to keep it a secret. I made a quilt for a wedding present for two very good friends, Kiki and Pat. Kiki is one of my (only) readers and I didn't want to spoil the surprise so I kept it all a secret, which was very hard.

Without further adieu, the wedding quilt:


 I used a charm pack and light blue fabric for the sashing using a modified version of THIS pattern.


 I like this part, even if as Charlie said, "the writing varies greatly in size."


My only downfall was that I am terrible at math and made the quilt in a very funny size; essentially it's a square quilt. I suppose it would be good for going at the foot of a bed or using on the couch.


I had wanted to machine quilt this one but I got too scared and chickened out, so it's hand tied with red embroidery floss, which I think is incredibly cute, but I might be biased.  I couldn't resist a few shots of the quilt on a rocking chair.


As always, I used THIS tutorial for the binding. I am almost to the point where I don't have to look at the tutorial anymore, but I still check just to be sure.

My goals of finishing the quilt before the wedding, keeping it a secret, and making Kiki cry when I gave it to her were all successful. Yes!!!

Thanks for reading!

Lauren

Saturday, July 30, 2011

Wedding Craft Run Down: Decor

Next on the list of wedding craftiness is the decor. I bunched this all together because there isn't a whole lot to say about each item.

First is the tissue paper pom poms. I can't remember where I first saw these but I knew I wanted lots of them hanging from the ceiling of the tent. Martha Stewart has a how-to that I followed. The only bummer is the length of standard tissue paper is not long enough to make these pom poms. I made one out of a stack of 8 sheets of tissue paper and it was horrible. I finally figured out that the sheets weren't long enough so I had to overlap sheets, to make them the correct length, which took a while, then do the steps Martha outlined. Another sort of pain in the tuckus was rounding the edges; seems pretty easy for the first three pom poms but when you're on your 19th pom pom your hand gets a bit sore.
Here are some pictures of the growing pile.


To hang them up you cut small gauged wire and make an "S" putting one end through the loop you made on the pom pom, and one around whatever you're attaching it to. We used the strands of lights. Here is a picture of the pom poms all hung up (Thanks Jaclyn for the picture, can you believe I didn't have time at my own wedding to take pictures?!?): 


While you're looking at the above picture I'll just quickly talk about the other decor. For table decorations my Mum and I picked out a bunch of vintage looking patterned fabric and she made table runners so each table had a different runner. The centerpieces were planted herbs in old enamel bowls we found at vintage stores. We used a bunch of old mason jars to hold candles and my dad made a bunch of candle holders out of birch trees. Lastly, to tell our guests what the table names were I painted pieces of wood with chalkboard paint then my friend Cait wrote the table names on them. The tables were all named for mountains or waterfalls that Charlie and I have hiked or skied. Then we went all geeky and arranged them geographically, even though no one noticed. And now I am sure you can see why the table arrangements took us so long.

Moving on to the outside decor. I painted out barn boards with directions for parking and other activities. I also painted more signs that told the mileage from where we were to towns that Charlie and I grew up in or have lived together. To figure out the distance I used this Google Map Distance Calculator.

Lastly, for outdoor decor, we hung up a bunch of quilts. Jaimie brought along the one she had made and finished the quilt she made us for a wedding gift, and the four I have made we hung up as well. To  hang them up pieces of clothes line rope were cut to length and tied around trees then the quilts were hung on the line with clothes pins.

Alrighty, that's all of decor. Maybe I'll do one last totally random post about all the other miscellaneous projects.

Lauren


Friday, July 29, 2011

Wedding Craft Run Down: Place Cards

Here is a quick wedding how to run down.

First up, place holders. We I knew we wanted people to have designated seats at the wedding. Upon deciding that I set out to find a cute and inexpensive way to make the place cards. Inspiration struck when I saw a picture of clothes pins holding the name cards. I knew I wanted the clothes pins to be more excited though so I decided to whip out my old friend Mod Podge, some paper, and get working.

This is what I came up with:


I cut strips of paper the height and length of the clothes pin, used a paintbrush to swipe on a layer of mod podge, laid the paper on top and swiped more mod podge to seal. I used left over paper from the invitations (because there was is a lot) to make the name cards. Then they cliped right in.

I only had 100 clothes pins, because that's all that was for sale at the store, but 129 guests so I needed to somehow figure out what to use to make 29 more place card holders. Inspiration struck again when I remembered a shoe box full of old wooden spools. I used pretty much the same technique for the spools as I did for the clothes pins, measure, cut, glue. These took a bit longer because you have to hold the paper for a while to let it dry since it's rounded (in other words, get your hands all gluey). 


After they are dry comes the tricky part, I used a band saw to cut a little line in the top to hold the place card.  A hand saw would work too though.
 

Lots of people asked me; "Didn't it take you a long time to make those?" To which I responded; "Not as long as figuring out the seating arrangements." Which is 100% true, but I liked the way they looked so the time doesn't matter. Now I have about 75 clothes pins and 15 spools and must figure out what to do with. 

At the wedding people also started clipping their place card to their clothes with the pins. Apparently they thought it was what we had wanted, even though the idea never occurred to me, but it turned out to be a good way for our guests to know each others names though. 

Up next: Tissue Paper Pom Poms/ Decor.

Lauren
Related Posts Plugin for WordPress, Blogger...